

There is nothing better than seeing your hedges looking uniform, neat, and perfectly sculpted.
While there is nothing stopping you manually trimming your hedges with hand shears, a powered hedge trimmer will make the job quicker and easier, and provide a professional finish.
Various factors come into play when trimming hedges, from the type of hedge you are working on, the tools you decide to use and the finish that you want to achieve. Whether you are trimming a small hedge or a series of large ones, with a fine leaf or thick branches, this guide is going to look at the best ways to get the hedges of your dreams.
When Is The Best Time To Trim A Hedge?
When is the best time to trim a hedge? This depends on the type of hedge you have and its current condition. As a general rule of thumb, hedges are best given a trim in winter, before it buds. There are several reason why this is the best time:
- Reduced Humidity - The reduced humidity and cooler air kills off many bacterial and microbial pests that could enter the freshly cut leaves and branches.
- Fewer Leaves - Fewer leaves means you have better visibility when trimming your hedge. This allows you to focus on areas that are too woody or entangled. Fewer leaves also means less stress on the hedge as less water content will be lost from the cuts.
- Buds Still to Break - When your hedge has not yet produced buds, you are able to trim it and allow the growing energy to be focussed on the areas where you want to see new growth. This is the best time to get a hedge to fill out in sparse areas.
Deciduous hedges, such as box, privet and viburnum do well by having a deeper trim performed in the late winter followed on with regular trims throughout the growing season. These types of hedges are much more forgiving and can handle intense cuts. As they are fast growers, they also make perfect hedges for topiary and shaping.
Prepare for the Cleanup First
Before you start trimming your hedges you should prepare for the cleanup at the end. It is surprising just how much mess can be left behind after a trim, so preparing beforehand can make the job much easier. There are plenty of useful tools and accessories that can be used, including:
- A groundsheet or tarpaulin - to place beneath the hedge area as you trim, which will collect the debris and make it easier to transfer to the compost heap or garden waste bags.
- A Leaf Blower - to blast air through the hedge to remove any loose or stuck leaves and branches. This also prevents them from turning brown on the hedge and detracting from your hard work.
- A hard bristled broom - to sweep up any leaves and branches that fall beneath the hedge or onto pathways.
- Heavy duty green bin - to place your cuttings into for easy disposal. This also prevents any debris from being blown across the garden by the wind.
- Rubbish bags - hedges are a magnet for litter, so getting under them and clearing it out will go a long way with helping create that perfect finish from top to bottom.
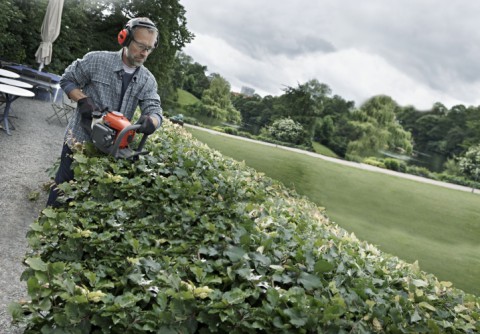
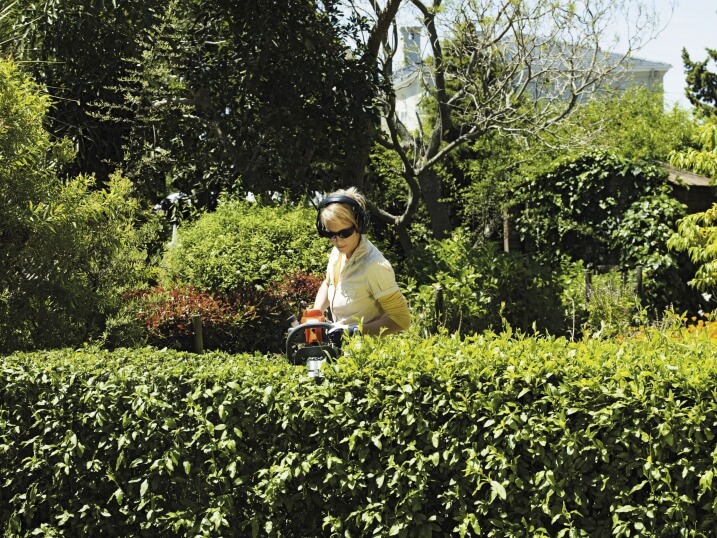
Use Personal Protective Equipment
Trimming hedges is risky business, and using the correct PPE is a must. Hedge trimmers can send sharp branches and twigs flying off in all directions, with the eyes being a magnet for them. The debris can also cause cuts and bruising to exposed skin, so cover up those arms and legs. Many shrubs and bushes release saps that are irritating to the skin, so it is a good idea to wear some heavy duty gloves too.
Gloves also make it easier to pull out any stubborn branches and brambles without any pain. If you are tackling any hedge that is taller than chest height, then you will probably be using a ladder. Ensure that you wear some decent quality non slip boots as the last thing you want is to be falling with a powered hedge trimmer in your hands. Don’t overlook your personal safety when trimming hedges as there are plenty of accidents just waiting to happen.
PPE Checklist When Trimming Hedges
Heavy Duty Gloves - provides sap and thorn protection
Protective Eyewear - rated protective eyewear, including UV protection. Prescription glasses won’t provide adequate safety protection
Long Sleeved Top - preferably one with anti-cut properties
Long Legged Trousers - anti-cut ones are best
Non-slip Boots or Shoes - especially when using ladders
Breathing Mask - to filter out any spores or insects from entering your mouth or nose
How to Get Perfectly Straight Lines
Straight lines and hedges go hand in hand like toast and butter. With a little bit of time and the best method, you will have uniform edges to be proud of. Once you have your straight edges in place, maintaining them is easy.

1 - Understand the Shape Dynamics First
For perfect hedge lines, it’s a good idea to trim into an inverted keystone shape. Aim to have a wider base and a narrower top. The reason for this is because the tops of many shrubs tend to grow outwards faster than the bottom. Aim for a sloping effect of a 6 inch difference between the top and bottom to allow maximum sunlight to penetrate the hedge and allow for easier maintenance as the top grows out.
2 - Employ a Little Bit of Maths
This is particularly helpful when trying to tame a heavily overgrown hedge. All you need is some string, several ground stakes and a tape measure. Begin by measuring the width of your hedge at both ends. From the rear side place a stake at each end and then attach string to each of them. Measure out the required width (14 inches is ideal) and then stake 2 more stakes at the front of the hedge. Now run string around all 4 stakes and you have the base template set.
Next, measure inward toward the centre of the hedge from each stake by 3 inches. Stake in 4 sturdy bamboo canes at each 3 inch mark and you have the top width in place (run string to all for canes to create the top guide). Finally, from the highest point of the hedge against the bamboo canes, tie some string down to the ground stake nearest to it for the incline slope. When following this method, it’s always a good idea to stand back and look at your lines by eye as you go, as the ground may not be perfectly flat or there may be conflicting lines nearby.
3 - Cut from the Ground Up
It is easier to cut a hedge from the ground up when trying to get uniform lines.If you go too deep at the top then it is much more difficult to adjust your cutting depth at the bottom. Using a gliding motion back and forth, make your way from one end of the hedge to the other at ground level. Going about a third of the way up. Next, head back on the opposite direction focussing on the middle portion of the hedge, gently tapering the cut in line with the diagonal guide string. Lastly, trim the top third of the hedge, again tapering it to blend with the middle third.
Once all of the sides have been cut, inspect it for uniformity and touch up any areas as necessary. The final stage is to cut the top. Place the hedge trimmer horizontal to the hedge top and gently cut away from yourself from front to back. Ensure you don’t place too much pressure on the hedge trimmer when cutting away from yourself to avoid any unsightly dips or cut outs.
Introduce Some Topiary and Sculpting
Topiary can introduce a whole new look and feel to a garden or yard. When starting out with topiary, avoid complex designs and aim for geometric shapes. Geometric shapes add an air of class and elegance to a garden and can help make it appear more formal. There is more to topiary than simply cutting shrubs and trees into shape.
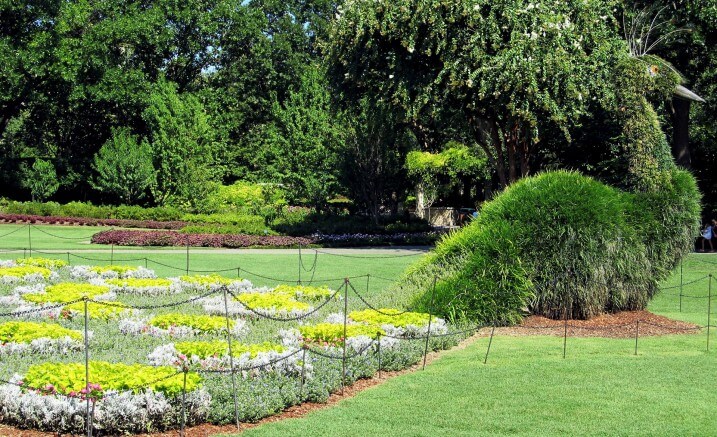
Globes, pyramids, domes, boxes, you name it and someone has tried to achieve it without success. There are a few things that are needed to get those precise and handsome geometric hedges perfected. What the eye sees is only the tip of the iceberg. To be able to get hedges and statement shrubs like this you will need:
- An appropriate shrub with compact leaves and good growth.
- A wire or wooden frame that is placed on the outside of the shrubs.
- Adequate light and water conditions
- Hand secateurs and a powered hedge trimmer
- Cable ties to control branch direction and growth
Typically, a geometric shrub is purchased as a standard small shrub. It is then planted in an appropriate area for its growing conditions and given a hard cut back to encourage new growth. Over the shrub, a wire or mesh frame is installed and left in place. The shrub will begin to grow around and through the frame and begin to take on its shape. In the first year, a gentle trim to remove any longer branches is all that is required. By the second year, you should be able to use your hedge trimmer to follow the frame as a guide and create the desired shape. Depending on the shrub variety, you may need to trim it fortnightly or annually.
Sculpting a Hedge
Sculpting a hedge is probably one of the most fun and expressive ways to trim. When it comes to sculpting, your imagination is your only limiting factor (and your hedge size). It doesn’t need to be hard to do and it eliminates the need for absolute precision. Below are some of the most popular hedge sculpting designs and how to achieve them.
Rolling Waves
Rolling wave hedges have nice and straight sides with a gentle rolling top that raises up and down. This design actually resembles hills and can help a hedge seamlessly blend into the scenery behind it. But how do you achieve this effect? It’s actually quite simple. Once you have taken care of the sides, stake several tall bamboo canes at equal distances along the length of the hedge. Spread them further apart for gentler waves or closer together for more peaks.
Once the canes are in place, begin by starting at one end of the hedge and cut upward toward the first cane. Keep the angle gentle and once you reach the first cane, begin to cut downward toward the next one. Repeat this along the entire length of the hedge. Always have the two ends of the hedge begin with the lower part of the wave for a perfect finish.
Castle Tops
These dramatic tops give hedges a unique and gothic appearance. Castle tops work by cutting out alternating box shapes from the top of the hedge. This type of sculpting is perfect for those who love a symmetrical finish with straight lines. However, this one does require a little bit of precision. You will need a tape measure, string and bamboo canes at hand.
Measure your hedge and then approximately every 12 inches stake a bamboo cane into the ground. Once all of the canes are in place, measure the hedge down 10 inches from the top and mark each cane with a black marker pen at this position. Tie the string to each cane and work out where you want the cutouts to be. Using a hedge trimmer, cut vertically down to the height marked on the first and second cane. Then cut between them horizontally to cut out the box shape.
Do not cut between the second and third canes and move on to the third and fourth canes. Repeat the process until you have worked along the entire hedge. The sculpted edges may look bare for a few weeks, but this will quickly grow in again. Maintain it with a gentle trim once every 6 weeks during the warmer seasons to keep its shape.
Maintain your tools for a superior cut. Regular lubrication and sharpening will help prevent any dull blades from damaging your hedge. One of the biggest culprits for hedge damage are blunt tools that create blunt cuts. The sharper your tools are, the cleaner the cut will be.


